Step 7: Creating an Avisynth script
Then go to the preview window and Select Save & Encode from the file menu.

Now you have quite a lot of options:
 Gordian Knot will select
a resizing filter for you depending on the bitrate. If you don't like its selection
modify it. I always select Neutral Bicubic here.
 Then
we have some more filtering options.
If DGIndex showed your source as interlaced PAL and the preview was interlaced you enable Fast Deinterlacing here.
If DGIndex showed your source as NTSC FILM below 95% you enable Inverse Telecine here and you must also change the framerate that you set in step 4.
In all other cases set Field Operations to None.
If you're dealing with a noisy source you can also select a noise filter of your liking. I personally never use that filter since I find it degrades the image quality (makes the image less crisp).
The next option concerns subtitls and can be jumped if you have no subtitles.
 Then
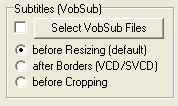
the subtitles. Here you are at a crossroads: If you want permanent subtitles
press the Select VobSub Files button and select the IFO file from the 2 files
that VobSub has created for you. If you prefer to have subtitles that you can
switch on and off during playback and in multiple languages don't select anything
here, your subtitles are already properly prepared. The after Borders option
is for VCD/SVCD creation only and does not concern us.
Make sure No Trim is selected, then press Save and select
a name for your Avisynth file. This will create an Avisynth frameserving file
that you're going to load into VirtualDub for video encoding later on.
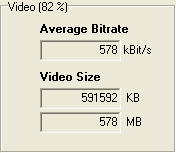
Before you quit GKnot there's one more thing to be taken care off: Write down the Video Size in KB, you're going to put this value in the codec configuration for the 2nd pass.

>> BACK
This document was last updated on August 10, 2005