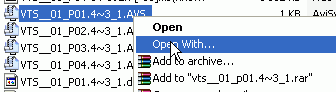
As previously mentioned, PAL material can be interlaced and currently DIF4U cannot automatically determine this reliably. So we'll have to do this the hard way. Start Windows Explorer and go to the directory where the AviSynth scripts (.AVS) reside. Only files that have an 'I' in the filename need to be analyzed. Then right click on such a file and select - Open with...
Then select Windows Media Player. A window will open where you'll see the movie playing. Look for interlacing artifacts which you can easily identify by horizontal lines that go through the picture (it kinda looks like holding a comb in front of your screen).
There are 3 possible outcomes:
Double click on the respective AVS script. The script will look like:
import("C:\Program Files\DoItFast4U\new.avs\addaudio.avs")
LoadPlugin("C:\Program Files\DoItFast4U\new.avs\mpeg2dec3.dll")
Mpeg2Source("VTS__01_P01.4~3_1.d2v")
AddAudio()
ConvertToYUY2()
Now add the following following two lines:
LoadPlugin("C:\Program Files\DoItFast4U\new.avs\decomb.dll")
FieldDeinterlace(blend=false)
In the end your script should look like this:
import("C:\Program Files\DoItFast4U\new.avs\addaudio.avs")
LoadPlugin("C:\Program Files\DoItFast4U\new.avs\decomb.dll")
LoadPlugin("C:\Program Files\DoItFast4U\new.avs\mpeg2dec3.dll")
Mpeg2Source("VTS__01_P01.4~3_1.d2v")
FieldDeinterlace(blend=false)
AddAudio()
ConvertToYUY2()
Save this file.
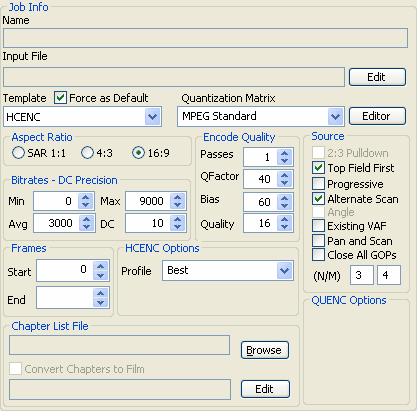
Make sure that 2:3 Pulldown is unselected (this is for NTSC users).
If TFF is written in the filename then make sure Top Field First is selected. (If BFF is written, Top Field First should be unselected).
Alternate Scan selected.
Progressive unselected.
Angle needs to be selected only if this asset is an angle (denoted
by the filename).
Other Information
The Frames options would allow you to limit the encoding range (don't touch this if used in conjunction with DIF4U). The same goes for the Chapter List File options. However, the Edit button is interesting so let's have quick look (but remember not to change anything):
Nice, isn't it? This player allows you to set, remove and change chapter positions.
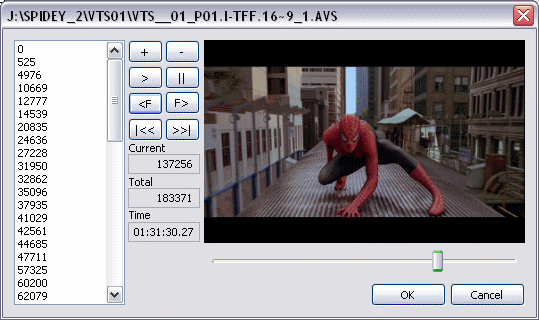
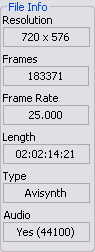 On
the very right of BCCE, you'll find some information about the job you're currently
editing:
On
the very right of BCCE, you'll find some information about the job you're currently
editing:
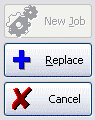 If
any settings have been changed then press the Replace button, or Cancel if you
have changed your mind.
If
any settings have been changed then press the Replace button, or Cancel if you
have changed your mind.
Now proceed to the next AVS file and repeat the procedure.
Once you're sure all your settings are correct, start encoding by pressing the green play button. BCCE will perform all encoding steps for you and will even take care of 3:2 pulldown after encoding for all NTSC FILM assets.
>> BACK