Converting Closed Captioning to Scenarist Subtitles
Programs Needed:
Vobsub
(or DoItFast4U!)
exclusively
MaestroSBT
MS Word(!)
Subrip 1.14
(if you ripped your CC stream with DoItFast4U! go straight to Step 2!)
This guide was created because many people have complained that either their TV or their DVD settop will not play closed-captioning (Line21) streams. Here's a way to convert those pesky streams to subtitles and get them imported into Scenarist!
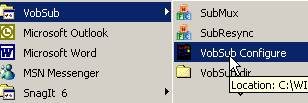
Step 1
Open up Vobsub, using the VobSub Configure
icon.
Click Open, change the files of type to Ifo and Vobs, select your .ifo file, and hit Open.
Select the folder to output the .srt to. Hit Open.
Scroll down to the cc stream. Select it.
Click the right arrow. It should look like this: 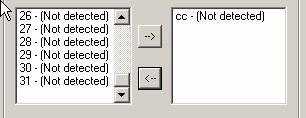
Hit OK. Wait for Vobsub to create its output files (takes a while). After it’s done, Hit OK, close it. Then go to the directory where it created its files.
Step 2
Delete all but the regular CC .srt file, and the .raw file. Yes, delete the unicode.srt also. It isn’t needed. The .raw isn't used in this guide, but it will be used in my next guide which will show you how to convert the raw data to Line21 data and use it in Scenarist!
Open Subrip 1.14. Do NOT use 1.15, as
it won't work for this method. Click the ![]() button and then File>Open. Select your .srt file.
button and then File>Open. Select your .srt file.
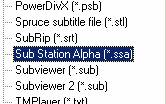
Select Output Format>Select Output Format. From the list, select Sub Station Alpha.
Hit Convert to this format. File>Save As. Save your .ssa.
Select Output Format>Select Output Format. From the list, select Sonic Scenarist. Change the framerate if needed, and configure your colors as explained in doom9’s guide on subtitles.
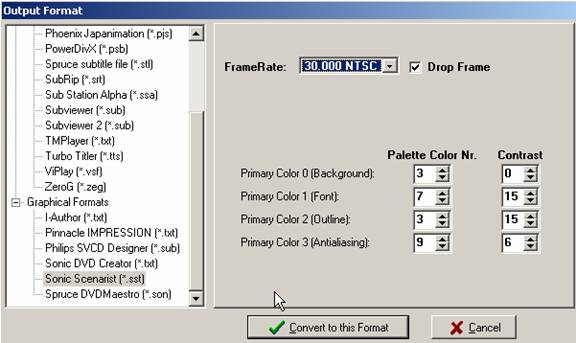
Hit Convert to this format. File>Save As. Save your .sst. It will be a template file for your final .sst. Name it something similar, like template.sst. Close Subrip.
Open your .ssa in MS Word.
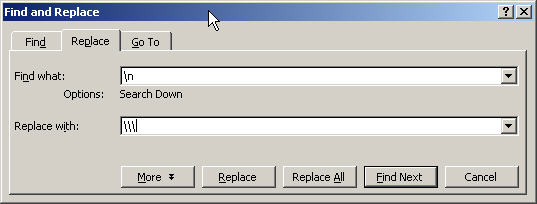
Edit>Replace. Replace \n with \\\ (see example below). Hit Replace All. Close the Replace Dialog Box.
Edit>Select All.
Format>Change Case>Title Case
Edit>Replace.
Edit>Replace. Replace \\\ with \n. Hit Replace All. Close the Replace Dialog Box. This keeps the second line from having the first word lowercase. (My example at the bottom shows how it looks BEFORE i figured this out!)
Save your SSA. Make sure it doesnt get any extensions added to it. It needs to have extension *.ssa.
Open your *.ssa in MaestroSBT.
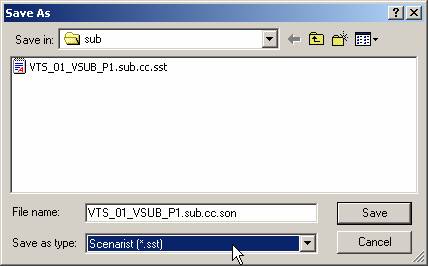
"Set Files">Browse. Change Save as Type to Scenarist (*.sst). Set filename (or just leave it as it) and hit Save
Select Render. Change Bitmaps to Windows
BMP (RGB). 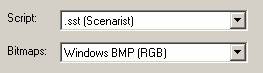
Change Color Rendering to “Only
one set of text….”, then click Color Keys 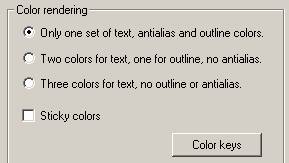
Set your color keys like this: 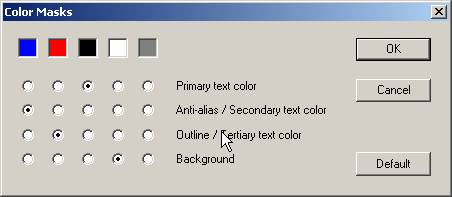
Hit OK, then Click Timing. Set your timing
to your fps of your video. In my case it’s 29.97 with drop frame. 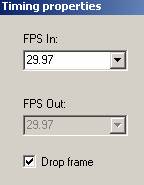
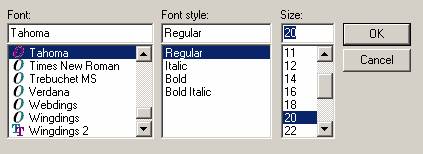
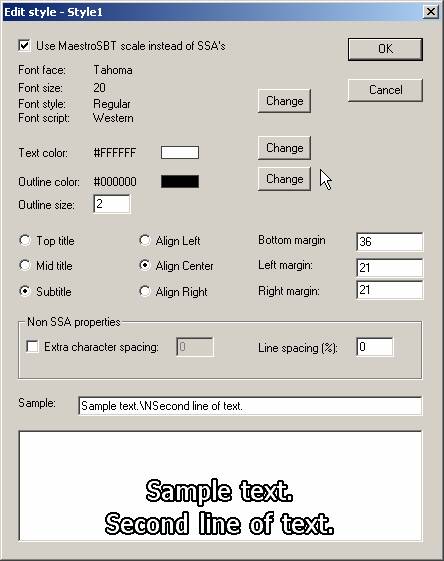
Click OK, then Styles, then select style1. Click Edit Style. Click the Change Button next to the font specs. Set your chosen Font. I like Tahoma, 20 point, so mine looks like this:
Click OK. Change Ouline size to 2 (adjust
to your preferred size, 2 looks great though!).
Change Bottom margin to 36. Click OK.
Hit OK, then hit Generate. Wait a bit as it renders your bitmaps.
Now the fun part. We need to merge your template.sst with the newly created .sst.
Open your new .sst. in a text editor (Notepad?).
Highlight everything from the first timecode and after, like so. Don’t
stop until you’ve highlighted all the way to the end.
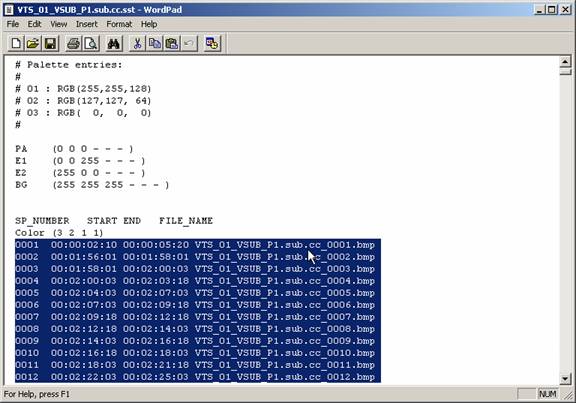
Hit Edit>Copy.
Open your template.sst up in a text editor. Highlight all the timecodes, just like you did with the new .sst file.
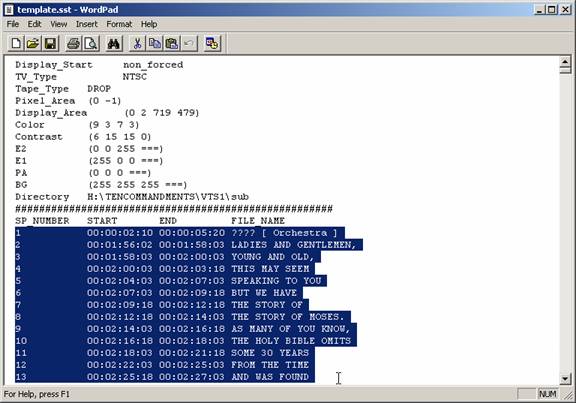
Hit Edit>Paste to replace all you've
highlighted with the data from the previous Edit>Copy.
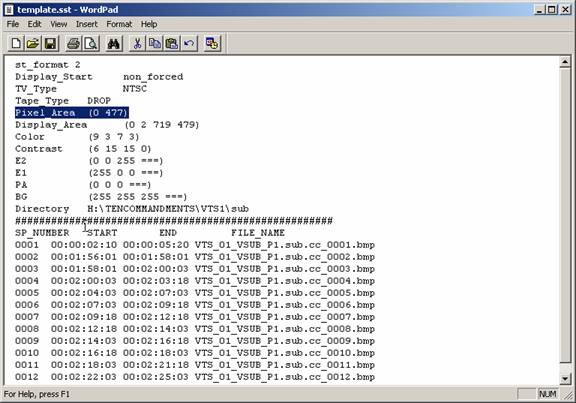
Make sure the Directory line points to the location of your sub bitmap files.
If not, change it.
Notice the Pixel Area line is messed up?
Change it to “Pixel_Area (0 477)”.
Save your final .sst. This is the .sst that you can now import into Scenarist!
It should look something like this:
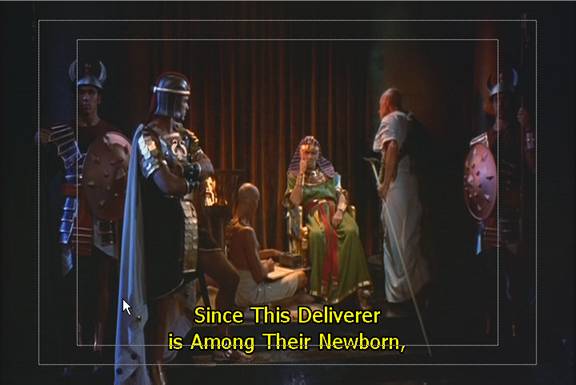
Here’s an example of what my template.sst rendered to in scenarist:
-Eyes`Only