SpruceUp Guide
SpruceUp is one of the most simple DVD Authoring tools I've seen so far. It
is no longer sold since Apple took over Spruce Tech last year (in fact all Spruce
products are suddenly not available anymore.. one is wondering if they plan
to simply put all Spruce Know-how into their Mac DVD authoring solutions and
let the PC solutions die out which would be a real shame as Spruce tools on
PC are really good) but you can still find demos and means to activate the Demo
on the net (the manual will teach you how you can register the product.. the
site still worked when I went there). A simple google
search should be all you need.
What makes SpruceUp interesting is that it can generate nice chapter overviews
with preview shots easily, supports 5.1ch AC3 audio (no encoding though) and
is generally very easy to work with. It also supports writing your DVDs using
your DVD burner (or burn miniDVDs using your CD burner.. but these are not compatible
to most standalone DVD players), create DVD images that you can burn using your
DVD burning program or just compile a project to a number of VOBs, IFO and BUP
files.
Step 1: Sources
SpruceUp will accept DVD compliant MPEG-1 and MPEG-2 video files, and MPEG-1
layer 2 (commonly known as mp2) and AC3 files (including 5.1 channel AC3) as
video files. Furthermore it accepts Bitmaps (.bmp), TIFF images, JPEG images
and Targa images (.tga) as background source for a menu. It also supports Photoshop
generated buttons but creating buttons is outside of the scope of this guide
(and you probably know Photoshop a lot better than I because I've never used
it) but you'll find some pointers in the SpruceUp manual. Generally I strongly
suggest that you read the manual beside this guide because the guide will not
cover every aspect of SpruceUp.
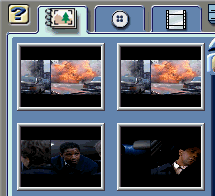
SpruceUp can generate chapter overviews easily by taking the chapter start
frame for each chapter and put it onto a static menu. Menus cannot be animated
and they cannot contain sound. On the other hand, you can take any frame from
your videos and create a menu page out of it within the program. If this is
not enough, get the DVD and rip the menus (vts_xy_0.vob, and video_ts.vob files)
and grab whatever frames you need from there. Make sure that you use the original
DVD resolution (720x480 for NTSC and 720x576 for PAL) for these shots.
On the video side we have the limitation that you cannot append video tracks
so your main movie must consist of one video file only or you'll have to use
the menu to access other video files.
Step 2: Basic Overview
The SpruceUp window has 4 essential parts:
 The
asset part. Here you can manage all your so-called assets. Assets are menu backgrounds,
buttons and videos. The currently active tab is the menu tab. The 2nd one (the
shirt button) represents menu buttons and the last one showing a film frame
represents all your video assets. Audio assets cannot be imported separately,
you'll need an audio file that has the same name as the video file (for instance
video.m2v -> video.mpa) with the appropriate extension so it will be loaded
automatically once you add the video asset.
The
asset part. Here you can manage all your so-called assets. Assets are menu backgrounds,
buttons and videos. The currently active tab is the menu tab. The 2nd one (the
shirt button) represents menu buttons and the last one showing a film frame
represents all your video assets. Audio assets cannot be imported separately,
you'll need an audio file that has the same name as the video file (for instance
video.m2v -> video.mpa) with the appropriate extension so it will be loaded
automatically once you add the video asset.
The drawer button (halfway cut off in the screenshot) allows you to load some
predefined styleset (a collection of menu backgrounds and buttons). You may
be able to find such stylesets on the web via the help menu of SpruceUp.
The 2nd part is the 3 big buttons below the asset part.
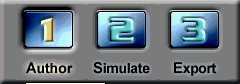 Until
you're done authoring you'll always want to have button number 1 selected. The
meaning of the buttons is pretty straightforward.. once we're done authoring
we're going to simulate, come back to authoring if something goes wrong, go
back to simulation to test if our fixes did the job, then export the whole project
once everything works as expected.
Until
you're done authoring you'll always want to have button number 1 selected. The
meaning of the buttons is pretty straightforward.. once we're done authoring
we're going to simulate, come back to authoring if something goes wrong, go
back to simulation to test if our fixes did the job, then export the whole project
once everything works as expected.
The 3rd are is below the main window and contains the overview over the menu
pages.
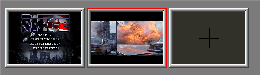 Initially
this are will contain one rectangle with dark gray background (as the one to
the right in the screenshot). What you can see to the left is a project I'm
working on which already has 2 menu pages.
Initially
this are will contain one rectangle with dark gray background (as the one to
the right in the screenshot). What you can see to the left is a project I'm
working on which already has 2 menu pages.
Last but not least we have the main area where we'll do all our authoring work.
There are 4 buttons below the main area.
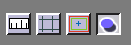 The
first one shows a ruler grid on top and the side of the menu being shown which
can be useful to align buttons, the 2nd one overlays a grid over the whole image
which can be used to very easily align buttons or text but usually is very disturbing
so you'll only use it when you have some alignment work to do that the auto-alignment
can't take care of, the 3rd one shows the safety zones for a TV monitor (you
should make sure that all your buttons stay within the smaller of the two rectangles
being shown when you press this button), and the 4th one activates or deactivates
a dropdown shadow (more about this later).
The
first one shows a ruler grid on top and the side of the menu being shown which
can be useful to align buttons, the 2nd one overlays a grid over the whole image
which can be used to very easily align buttons or text but usually is very disturbing
so you'll only use it when you have some alignment work to do that the auto-alignment
can't take care of, the 3rd one shows the safety zones for a TV monitor (you
should make sure that all your buttons stay within the smaller of the two rectangles
being shown when you press this button), and the 4th one activates or deactivates
a dropdown shadow (more about this later).
Step 3: Asset import
The first time you start SpruceUp you'll be shown the following screen:
 Here
you can select the default properties for your project. Set the appropriate
TV format and project type. You have the possibility to create a miniDVD like
(but not standalone compatible project) by selecting CD-R/W XXY MB, a DVD-R/W
project or a project for DVD+RW.
Here
you can select the default properties for your project. Set the appropriate
TV format and project type. You have the possibility to create a miniDVD like
(but not standalone compatible project) by selecting CD-R/W XXY MB, a DVD-R/W
project or a project for DVD+RW.
Once done press OK. In the future this dialogue will not be shown when creating
a new project, which can be confusing when you want to create a project for
another TV standard. But selecting File - Preferences will bring up this screen
again. SpruceUp is a bit bitchy about last minute changes to these properties
so set them before you start a new project.
Now that we know where everything is let's get started. In the asset part of
the window press the movie asset button. Then right click in the empty area
and select Add Media Asset...

Select your video source (.m1v or .m2v files). SpruceUp will then analyze the
input file for DVD compliance and if there's an audio file that matches the
video name this file will also be loaded. Load all your video assets like this.
Then go to the menu assets part and use the same right click -> add media
asset operation to add menu pages you've created on your own. If you would just
like to take frames from the main movie that's fine as well, I'll show you how
to do that later on. Last but not least load any of the buttons you have created.
In this tutorial I will only use predefined buttons that are present in the
downloadable demo edition of SpruceUp.
Step 4: Create menus
Select an image for the main menu from the assets and drag and drop it to the
empty dark gray rectangle below the main window (remember, that's where the
menu pages are). You'll then see a small thumbnail representing your menu and
the dark gray rectangle will move one position to the right. The menu to the
left is the first play menu.. when you enter the disc this menu will be shown.
If you want to start with a movie that's fine, too. Just drag and drop a movie
to that first position and the thumbnail will look like an actual film roll
to indicate you that we're dealing with a first play movie item.
Then drag and drop some buttons from the button assets to the main window where
the menu is being shown. Then clicking onto that button will allow you to move
it around or change the size. These operations are straightforward and correspond
to how you handle images in almost any program so they do not deserve special
explanation.
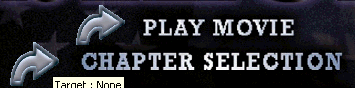 Here
I've created two buttons. One will launch the main movie, the other will activate
the chapter selection menu. Initially these buttons don't do anything.
Here
I've created two buttons. One will launch the main movie, the other will activate
the chapter selection menu. Initially these buttons don't do anything.
In order to associate an action to a button left click onto the button, then
right click to bring up the button menu.
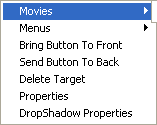 Here
you can see all the options a button offers. If you click on Movies you'll see
a list of all your movies, I associated the play movie button to Movies ->
my first movie -> Chapter 1 so the movie will start to play from the very
beginning.
Here
you can see all the options a button offers. If you click on Movies you'll see
a list of all your movies, I associated the play movie button to Movies ->
my first movie -> Chapter 1 so the movie will start to play from the very
beginning.
Using the menus option you can link to another menu (but you have to create
these menus first).
Bring Button to Front and Send Button To Back can be used to handle overlapping
buttons but that's outside the scope of this guide. Delete target will disassociate
the button with any chosen action, the properties option is pretty useless if
you plan to play the disc on a standalone so don't use it. Last but not least
we have the DropShadow Properties.
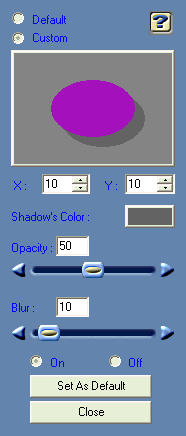 Default
would chose the default dropshadow action of SpruceUp (more about that in the
manual).
Default
would chose the default dropshadow action of SpruceUp (more about that in the
manual).
Custom allows you to select your own behavior. First of all we have the X and
Y position. These indicate the position difference between the object and it's
shadow. Just above these options you can see a preview that will help you illustrate
what these options do. Change the values and watch the initially dark gray shadow
move around.
Then you can of course change the color of the shadow by clicking on the colored
button and select a new color.
Opacity indicates how transparent the shadow is. 0 means completely transparent,
100 means opaque.
Blur sets the shadow's softness, the higher the number the more blurred the
shadow will be. If you want all further buttons you create to have the same
behavior select Set As Default, then Close.
We're going to create the next menu from a frame of the movie. In order to do
that, go to your video assets and double click on your main movie.
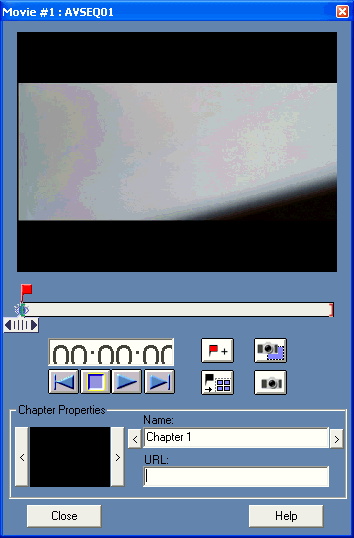 First
you'll see a preview of your actual movie.
First
you'll see a preview of your actual movie.
Below the preview you'll see a slider, an eye and a red flag. The flags represent
chapter points, the eye shows the position of a chapter thumbnail (more about
this later), and the slider can be used to move around in the movie.
Then you have the current time position and some basic playback controls.
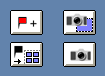 These
4 buttons are interesting. The first one with the red flag and the plus sign
creates a new chapter at the position you're currently at. Use the slider to
move to the appropriate position then press that button and repeat the process
until you've set all desired chapter points. The 2nd button would make the frame
currently being shown in the preview window the menu background for the currently
selected menu page.
These
4 buttons are interesting. The first one with the red flag and the plus sign
creates a new chapter at the position you're currently at. Use the slider to
move to the appropriate position then press that button and repeat the process
until you've set all desired chapter points. The 2nd button would make the frame
currently being shown in the preview window the menu background for the currently
selected menu page.
The left lower button is also very interesting. It will create chapter access
points via thumbnails on the currently selected menu page. So, you'll have a
set of buttons, each showing a miniature version of the frame the chapter starts
with on your menu page. For now we're not going to use this function as we have
no chapter selection menu ready but we'll come back here later. The last button
allows you to create a menu asset from the frame currently being shown. Move
the slider to a good position, then press this button to create a nice chapter
selection background. Repeat this process as often as you think it's necessary.
Usually you have 6 chapter positions on one chapter selection menu page.
Chapters will automatically be named Chapter 1, Chapter 2, etc. URLs are only
useful if you create a disc solely for PC playback.. you could add HTML urls
to create truly interactive discs but this would make standalone playback impossible
so keep that in mind.
Now that we have chapters set and a nice background for our chapter selection
menu let's create that menu. Go to the menu assets, and drag and drop that new
image we've created to the next free menu position. Then click on the new menu
and add two buttons. One pointing to the left to allow the user to jump back
to the main menu, one pointing to the right allowing to go to the next chapter
selection menu (after all.. placing 40 chapter selection thumbnails on one single
page is overkill).
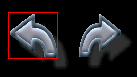 Link
the first button to the main menu, by either first left clicking on it (to select
it), then right click and selecting Menu - Menu 1 - Button 1, or by simply dragging
and dropping the menu1 thumbnail from below the main window to the button. Note
that when using the first method you can select which button will be activated
by default. For instance say I link that back button to Menu 1 - Button 2. Button
2 is the button that launches the chapter selection menu. So, if the user presses
that back button, then presses enter once again he'll come back to the chapter
selection menu. If I set it to Menu 1 - Button 1, pressing enter in the main
menu will launch the main movie.
Link
the first button to the main menu, by either first left clicking on it (to select
it), then right click and selecting Menu - Menu 1 - Button 1, or by simply dragging
and dropping the menu1 thumbnail from below the main window to the button. Note
that when using the first method you can select which button will be activated
by default. For instance say I link that back button to Menu 1 - Button 2. Button
2 is the button that launches the chapter selection menu. So, if the user presses
that back button, then presses enter once again he'll come back to the chapter
selection menu. If I set it to Menu 1 - Button 1, pressing enter in the main
menu will launch the main movie.
Then create all other necessary chapter selection menus and make sure that
the last chapter selection menu has a button to come right back to the main
menu. By now you should have no problem knowing how to do that.
If you have trouble aligning your buttons you can use the alignment options
right below the main window. Just hover with your mouse over an option and you'll
get a brief explanation what it does. Inactive options are grayed out (as you
can see in the screenshot only 2 options are active).

The last part of the menu creation step is to actually have working chapter
selection options.
Select the menu you want to create chapter thumbnails for, then go to the main
movie and use the appropriate button to create chapter selection thumbnails.
Before you do you may want to learn about the eye. The eye actually sets the
frame which will be used to create thumbnails for the chapter selection. So,
while chapter 1 starts at frame 1 this frame will usually be black and not make
for a good thumbnail. So you can click on the flag representing chapter 1, and
move the eye below the flag to a more interesting position.
The only catch here is that chapter thumbnails for all currently existing chapters
will be created. If anybody knows how to only create thumbnails for a limited
amount of chapters please let me know. What I did was simply delete all the
thumbnails I didn't need.
In the end your chapter menus will look like this:
 As
with regular buttons you can select, move and resize them and of course also
create dropshadows or re-link them.
As
with regular buttons you can select, move and resize them and of course also
create dropshadows or re-link them.
Once all the chapter selection menus are done you can start with the extras
you may have. By now you should have no problem creating new menus to launch
these extras.
Step 5: Simulation
Once you've created all disc menus it's time to verify if what you've done
does indeed work. Press the Simulation button in the lower left to start the
simulation mode.
If you've ever used a software DVD player you'll be right at home as the navigation
is really the same.
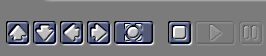
Use the navigation and playback buttons to navigate the disc as you would any
regular DVD discs and verify that everything works as planned. If it doesn't,
go back to authoring by clicking the authoring button in the lower left. Then
come back to the simulation mode to verify that your changes did what you wanted
them to. Once everything works as it should it's time to export the movie.
Step 6: Export
Here you have 3 possibilities. If SpruceUp recognizes your burner you can burn
directly to disc. Just in case press the Advanced button and uncheck Includes
Szyzgy player and SpruceUp trial.. we really don't need them, do we?
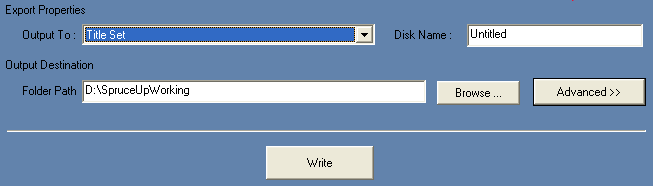
If your burner is not supported or you do not want to burn the disc right away
you can either select Title Set as shown above which would simply create all
the VOB, IFO and BUP files which you can burn using Nero later on or any other
burning software you might have. If in doubt how to use a certain burning software
refer to Derrow's guides.
The 3rd option is create a disc image which you can burn using your DVD burning
software later on. Creating an image seems to be the better solution, it has
been reported that more standalones will accept the discs when you first generate
an image, then burn this using a specialized DVD burning software rather than
just compiling the DVD and using a general purpose burning software to burn
the DVD.