Recode 2 - Global configuration
Press the More button to show Recode's options.
![]()
Then press the Configure button.
 The
first thing to configure are the DVD input options.
The
first thing to configure are the DVD input options.
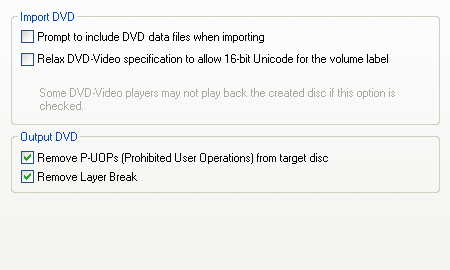
The Prompt to include DVD data files when importing only applies to DVD output and can be used to include DVD-ROM files that might be present on the DVD in your final project.
Relax DVD-Video specification to allow 16-bit Unicode for the volume label allows you to use a wider character set for the volume label, thus potentially creating problems with your playback device if it is not a PC.
Remove P-UOPs removes any user prohibitions that might be on the disc (such as ads you cannot skip, the impossibility to switch the language while watching the movie, etc.).
Remove Layer Break will remove the layer break that might be on a dual layer DVD.
Both Output DVD options only apply to DVD output.
Then proceed to Nero Digital.
 This
option obviously only applies to Nero Digital output.
This
option obviously only applies to Nero Digital output.
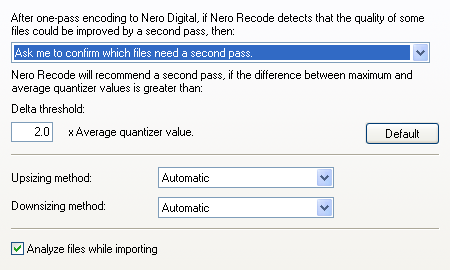
You can decide if Recode should ask you to perform a 2nd video encoding pass if the quality of the first pass isn't as impressive. Quite a good choice imho, but then again, Nero Digital is as fast that you're probably going to encode everything in 2 pass mode anyway. Using the Delta treshold, you can configure when Recode is going to ask you to perform a second pass. Each video frame is compressed using a certain compression factor, or quantizer. Using the default setting, if the average compression value is less than half of the maximum compression value, you'll be asked to re-encode. If you increase the Delta treshold, the difference has to be greater.
Furthermore, you can configure which resizing algorithm will be used. Upsizing method refers to the resizing method used when you increase the frame size (blow up the picture), Downsizing method refers to the resizing method used when you decrease the frame size (make the picture smaller). Automatic will automatically select a resizing method based on the properties of the source, but you can also force one of the three resizing methods: Bilinear, Bicubic or Lanczos. Bilinear is the least agressive and yields a somewhat smoothed picture, Lanczos is the sharpest of the resizing methods, preserving the most details.
Finally, if Analyze files while importing is checked, Recode will scan the video source when first opening a source.The General options are not so interesting so let's proceed directly to the Preview Window tab.
 Recode
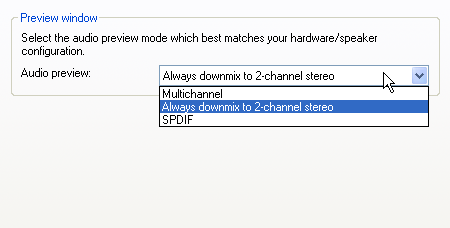
allows you to preview every video item with audio.
Recode
allows you to preview every video item with audio.
Set the Audio preview option to whatever best fits your current audio setup. Always downmix to 2-channel stereo will work everywhere, whereas Multichannel requires an analogue 5.1 audio output (and of course that output has to be connected to some speakers somewhere down the line ;) and SPDIF requires a digital connection between your PC and your receiver.
Now press OK to get back to the main Recode window.
>> BACK