Introduction
The Nebula DigiTV card is a PCI DVB-T card. It is designed to receive digital terrestrial TV broadcasts, and uses a Conexant Fusion 878A chip. It has an RF-in connector (obviously), but also has an RF-out socket. In addition it has a composite-in socket, plus a socket to connect the supplied remote control sensor which can be used with the supplied One For All remote control.
The card comes with its own software. but it also works with the Showshifter software. The Nebula software is very good, and is the subject of this guide.
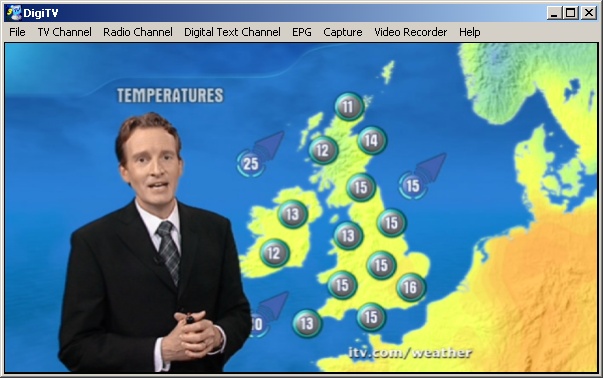
Installation is just a matter of plugging the PCI card into a unused PCI slot, plugging in a normal terrestrial TV aerial, installing the drivers, and installing the actual software itself. After rebooting and starting the application, it will start to tune into all the available TV and radio channels. This takes around a minute or so, and when tuning is complete, the main viewing window will be shown, and if the signal is adequate, the first TV channel that it found will be shown.
Initial Display
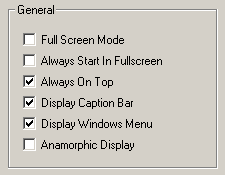
The default display is fairly minimalist. However, I prefer not to display the top menu bar or caption bar, which is done from the Display tab of the Settings window. To turn off the top menu bar simply uncheck Display Windows Menu, and to hide the caption bar just uncheck Display Caption Bar.
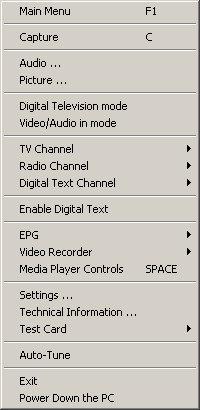
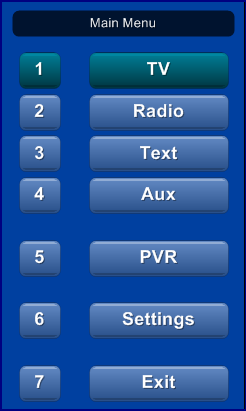
The software's functionality can then be accessed from the Windows popup menu which is displayed by right-clicking anywhere on the window, or by pressing the F1 key, which will bring up the "friendly" menu interface. The "friendly" interface, shown on the right, is more or less interchangeable with the standard Windows menu, but it can be a little unresponsive so the normal Windows menu is recommended.
Recording
The software has a very good PVR for recording and playback. It will record from timers which can either be manually set, or can be set from the two EPGs that it uses. The PVR can either use the 7-day DigiGuide EPG which it downloads over the Internet, or it can use the live 7-day EPG which is broadcast.
Setting a timer is simply a matter of selecting the EPG from the popup menu and then selecting the programme from the listing.
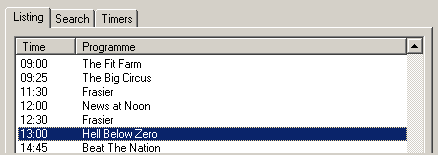
Double-clicking the selected programme then automatically sets a timer for that TV programme.
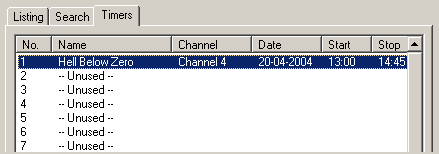
However, if you've gone out and forgotten to set a timer, you can simply pop into the nearest Internet cafe and set a timer remotely.
Simply type your IP address and port number, in the form http://12.34.56.78:2880, into Internet Explorer. The browser will then show you a login screen as shown in the following screen. Type in the login and password you've set for remote access to the Nebula software and press OK to proceed.
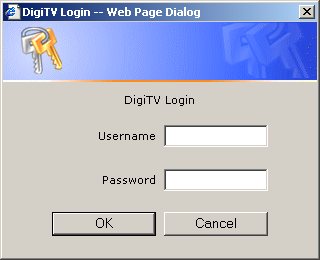
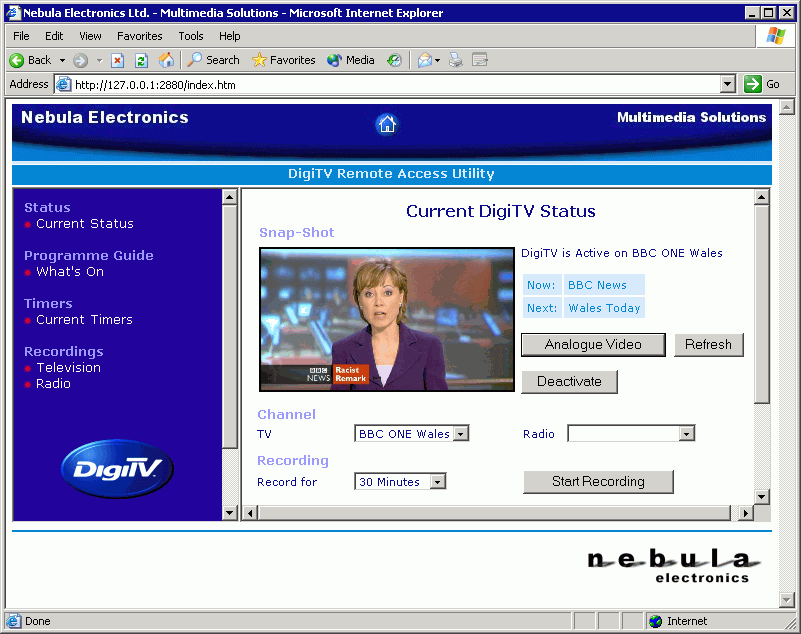
You can then set and access your timers, and view the status of the Nebula DigiTV software using the web browser.
When recorded, the programme is saved on hard disk as an MPEG2 transport stream. It can be played back with the Nebula software, or in any media player. However, with third-party media players playback may be jumpy depending on the installed codecs. The Elecard and PowerDVD codecs will play the MPEGs perfectly, as will the Nebula media player.
The MPEGs saved might already be DVD-compliant, but need to be converted from a transport stream to a program stream using PVAStrumento, for example, to make them fully DVD-compliant. They can then be burnt onto a DVD and should play back perfectly on a DVD player. For more information on this process, check out the DVB to DVD-R guide.
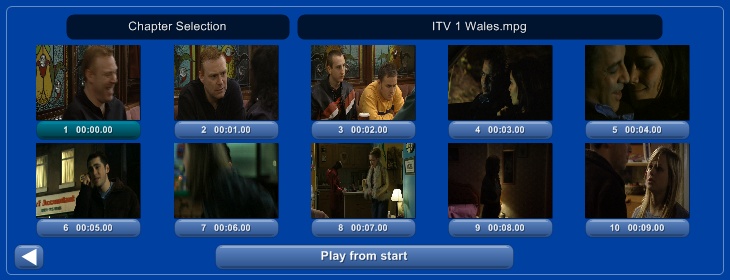
Interestingly, when accessing the recordings via the main menu interface (by pressing F1), chapters are automatically generated. This may or may not be useful, but it seems like a novel idea.
It's also possible to record the entire transport stream for a multiplex, effectively recording several TV programs at the same time.
Settings
The Settings window contains a row of tabs which allows customization of all the options in the software.
![]()
There are many options and it would be impractical to cover all of them in this guide, so I'll just cover the settings that are probably of most interest.
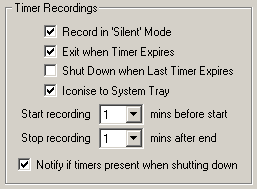
Timer recording settings
 These
options define the behavior of recording timers. You can choose whether they
record silently (Record in 'Silent' Mode), in which case the TV programme
won't be displayed but will just be recorded in the background. You can also
specify how many minutes are added before and after the scheduled times (Start
recording X mins before start / after end) in case of over-runs or early
starts. In addition, you have the option to tell the software to shut down the
PC after all timers have completed (Shut Down when Last Timer Expires),
and to instruct it to warn you of pending timer recordings when you shut down
the PC manually (Notify if timers present when shutting down).
These
options define the behavior of recording timers. You can choose whether they
record silently (Record in 'Silent' Mode), in which case the TV programme
won't be displayed but will just be recorded in the background. You can also
specify how many minutes are added before and after the scheduled times (Start
recording X mins before start / after end) in case of over-runs or early
starts. In addition, you have the option to tell the software to shut down the
PC after all timers have completed (Shut Down when Last Timer Expires),
and to instruct it to warn you of pending timer recordings when you shut down
the PC manually (Notify if timers present when shutting down).
Instant recording settings
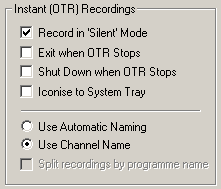 The
behavior of instant recordings is also set here - including whether to name
recordings automatically according to the programme information given by the
EPG, or simply by the channel name. You can also specify if you want recordings
split according to the EPG information. If you choose this, then separate MPEGs
will be created as and when the EPG information changes while recording.
The
behavior of instant recordings is also set here - including whether to name
recordings automatically according to the programme information given by the
EPG, or simply by the channel name. You can also specify if you want recordings
split according to the EPG information. If you choose this, then separate MPEGs
will be created as and when the EPG information changes while recording.
Audio settings
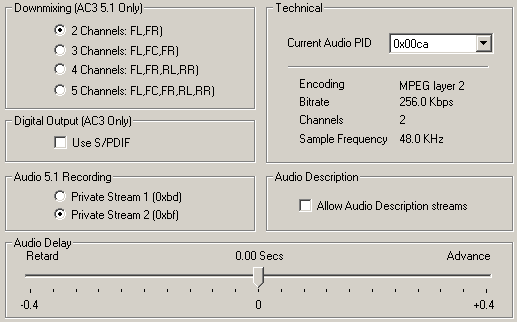 Here
you can select various options for audio output, including correcting audio
sync problems.
Here
you can select various options for audio output, including correcting audio
sync problems.
If your broadcaster transmits their audio channels using Dolby AC3 then you can choose the Downmixing option to suit your speakers. The software will then automatically downmix the number of channels that is currently being transmitted to suit your PC.
Because AC3 audio in some countries conflicts with the subtitling in others the Audio 5.1 Recording option allows you to choose onto which private stream the 5.1 audio should be recorded.
An Audio Description Stream is a secondary audio channel that is broadcast alongside the normal audio channel which contains the voice of a narrator that describes the visual aspects of a scene during breaks in the normal dialogue. It is intended for visually-impaired people, but could also be useful for keeping track of a TV programme while not actually watching.
Network Settings
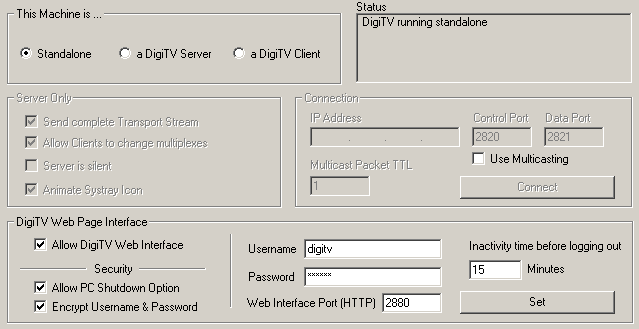 Here
you can setup a password for the remote access facility (mentioned above in
the Recording section), set the port, and allow or disallow remote access from
a web browser.
Here
you can setup a password for the remote access facility (mentioned above in
the Recording section), set the port, and allow or disallow remote access from
a web browser.
In addition, the Nebula card can act as a server and broadcast the transport stream that it's receiving over a standard network using the UDP protocol. As long as the Nebula software is installed on the client computers on the network, they don't need to have a TV card installed to receive the TV programs If allowed, the client computers that are receiving an entire transport stream can change channels independently of other clients on the network, as long as they stay on the same multiplex that the stream is coming from.
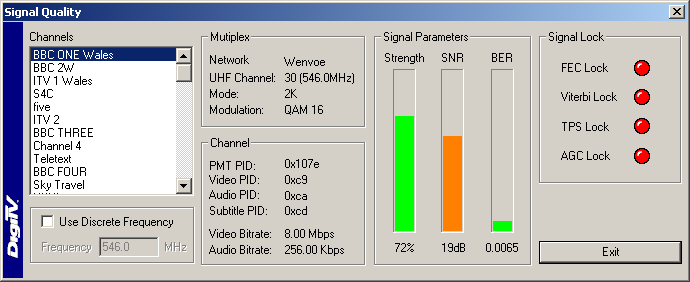
Technical Information
There is a basic information window which is accessed from the Settings option in the popup menu, which displays the bitrate, signal strength, and error rate, etc.
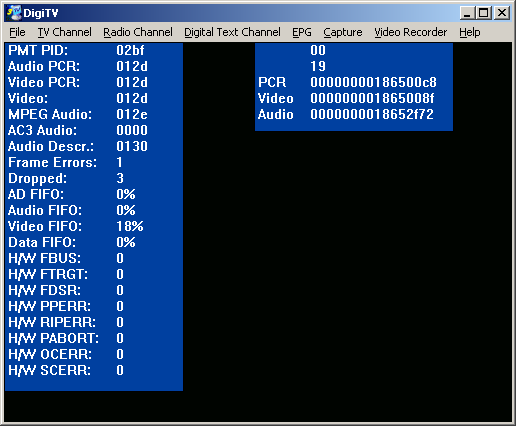
There is also a more detailed information display which can be accessed by pressing I when the viewing window is active and tuned to a channel.
Conclusion
As the software is continually being improved, this guide will be out of date soon.
Among the changes planned to the software is an option to save as a program stream, instead of a transport stream, so that the MPEG will no longer need to be run through a program to convert it to a program stream before burning to DVD.
There are also plans to include an MPEG editor into the software, presumably to edit out commercials from programs
So, in conclusion, the Nebula software is very comprehensive, but still easy to use. As the company are very good at enhancing and updating the software, it will certainly become even more so.