After everything is installed properly you have to enable the capture driver in order to show VirtualDub which source you are intending to use. Therefore, you have to open the TV application that came with your card. Afterwards you have to set the channel you want to capture and close the application again. If, as recommended, the tuner of the VCR is used, it has to stay switched on for the whole time of the capture process.
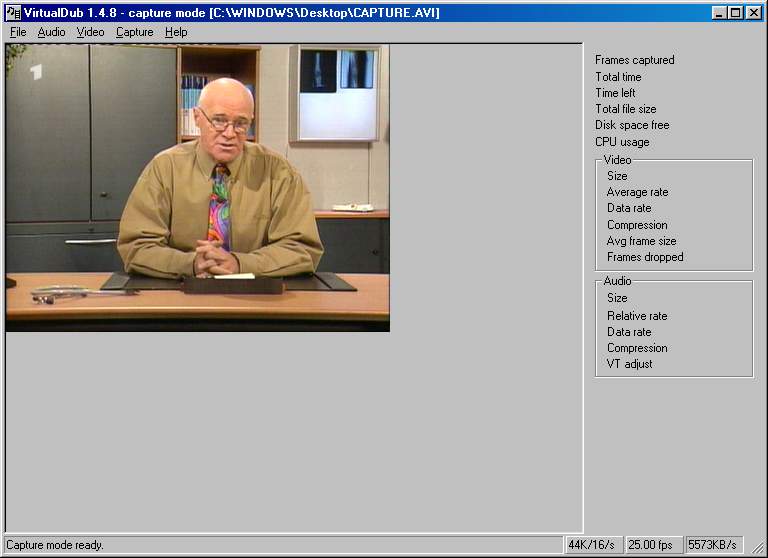
Now you have to open VirtualDub and switch to Capture Mode:
File -> capture avi
Now you should be able to see the appropriate picture in the
preview:
Tip: If you're using VirtualDub under WDM systems (W2K or Win XP), make sure " DirectDraw acceleration (both fields)" is enabled under "Capture" menu of VirtualDub. It will greatly improve the capturing performance of VirtualDub, it's especially useful on slower machines.
You should choose the following settings. They do not depend on the codec you are going to use later:
Audio -> Compression -> in the dropdown box
labeled 'name' you should choose CD-quality.
Note: If you got problems with hiss in audio or if you want to
capture old Mono VHS tape you can try other Audio formats, e.g.
44.1 kHz 16 bit Mono or even 32 kHz 16 bit Mono, but please don't
use any audio compressor on the fly to avoid problems.
Audio -> Volume Meter
If both the left and right channels are displayed similar to the screenshot below, you've got stereo sound and are all set. Now you have to choose the desired volume by moving the volume slider to the appropriate position (the slider should almost always be to the very left). If the audio is missing completely, you should check the settings to verify that Line In is selected as the audio source.

Video -> Overlay using WDM drivers (e.g. XP), Philips based cards.
Video -> turn off Overlay using VFW drivers, with BT8x8 chips. (If you have problems with dropped frames you might want to switch off preview too.)
Capture -> Settings
PAL: Set the framerate to 25, set the buffers as shown in the screenshot below. The option "Lock video stream to audio" only works for "Compatibility capture mode", so it doesn't do anything here.

NTSC: Due to a minor bug in VirtualDub the native NTSC framerate of 29.97 cannot be set. The capture will then be at a framerate of 29.971 fps, a framerate that AVI2SVCD will reject rendering the file rather useless. Therefore the fps MUST be set to 29.9697 to work with AVI2SVCD. (The option "Lock video stream to audio" only works for "Compatibility capture mode", so it doesn't do anything here.)
Capture -> Timing -> activate "resample audio data dynamically to match video clock".
This way you can avoid dropped frames, even if the audio and video are not running in sync. You will still end up with a sync'ed file.
Because of this modification written by Andreas Dittrich, dropped frames are almost extinct. More information on this topic can be found in the Capture-FAQ on Doom9.org, and this article by Mattheo (German only).
Capture -> Disk I/O
In this small window you can match VirtualDub to your computer's hard drive speed. I got tired of frequently switching these settings so I just leave the defaults. The "Chunk size 1 MB" and "Chunks in buffer 15" are good for hard drives with a 2MB cache. In the forum I've read that somebody with an 8MB cache drive has achieved best results choosing "Chunk size 512 KB" and "Chunks in buffer 16", but generally this is the all-too-well-known 'trial and error' game (again).
It is important to check "Disable Windows write buffering" just to make sure Windows does not have a chance to interfere.
Capture -> Capture Drives -> add spill drives
Short explanation: An avi file cannot get larger than 2 GB, even if win98 (FAT32) can handle files as large as 4 GB and WinXP/2K (NTFS) can handle files of almost any size. So you have to tell VirtualDub that it should simply split the files every time it reaches 2 GB. That is what spill drives are for; they allow the files to be loaded later as one logical file again. This ingenious idea by Avery Lee puzzles even large (and expensive) suppliers of capture software.
Fortunately we just have to click "Add spill drive" once, choose the appropriate path where you have sufficient disk space, and click OK (see screenshot).
Video -> Enable Multisegment capture
To set up the spill drives (which you've just done) is not enough though. You've also got to enable them.
In the subsections 4.3 and 5.5, the minimal recommended capture sizes were given for good quality high-size capping and good quality low-size capping. The latter can be used when you have a "slow" pc, or you don't have much hard disk space.
good quality high-size capping:
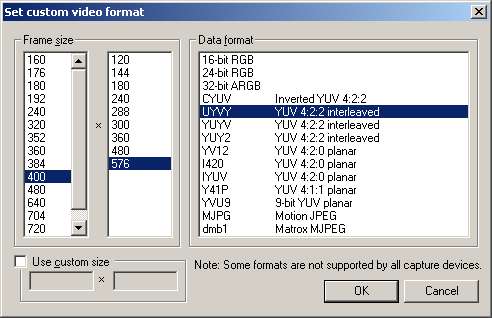
Video -> Set Custom Format
In the "Frame size" box you have to choose an
appropriate size (as advised in the sections 4 or 5), for
example 720x576 (or 640x480 for NTSC). For the "Data
format", choose YUY2 or UYVY. If your capture driver doesn't offer one of
these, try using the colorspace it offers (this probably will be some flavour of
RGB colorspace). Be aware that virtually all recent capture chips have YUY2 or
UYVY as their native format, so RGB-only is expected on some very old or very
off-the-wall devices.
Continue with the capture codec settings.
good quality low-size capping with horizontal and vertical reduction:
Setting up Vertical Reduction
Under the Video tab select "Vertical reduction" and
"2:1 Cubic (sharper)"

Btw, you could also choose "2:1 Linear (smoother picture)", but the quality is bit worse.
Video -> Set Custom Format
In the "Frame size" box, choose a recommended low
capture size (as given in the sections 4.3
and 5.5). For the "Data
format", choose YUY2 or UYVY. If your capture driver doesn't offer one of
these, try using the colorspace it offers (this probably will be some flavour of
RGB colorspace). Be aware that virtually all recent capture chips have YUY2 or
UYVY as their native format, so RGB-only is expected on some very old or very
off-the-wall devices.
Continue with the capture codec settings.
good quality low-size capping with horizontal and vertical reduction (VirtualDub-MPEG):
Using VirtualDub-MPEG 1.5.10 (or higher) it is possible to do a horizontal and a vertical reduction. This is very nice, if your pc is fast enough to cap at high sizes, but your are low on hard disk space.
Setting up Horizontal Reduction
Under the Video tab select "Horizontal reduction"
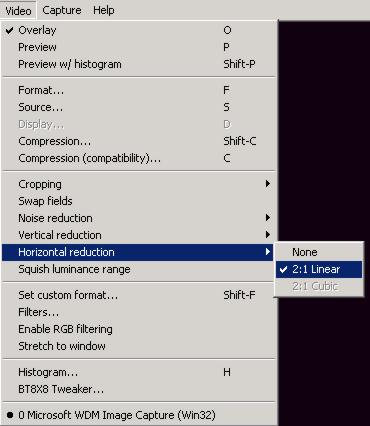
Setting up Vertical Reduction
Also select "Vertical reduction" and "2:1 Cubic
(sharper)"
Btw, you could also choose "2:1 Linear (smoother picture)", but the quality is bit worse.
Having Horizontal and Vertical reduction checked implies that full PAL or NTSC is captured, and is reduced to 384x288 for PAL (or 320x240 for NTSC).
Continue with the capture codec settings.
This is the moment you should have finally decided which codec
you want to use for the capture process:
Video -> Compression -> choose desired capture
codec:
If you are using a mjpeg codec for capturing (at quality 18 or 19) and you want good quality, you should do that at high sizes. At lower sizes (SVCD or CVD) you should use Huffyuv instead.
Huffyuv:
You should start with "Predict median (best)" from the "YUY2 compression method" drop down menu and if that doesn't work, because of a lack of disk space or dropped frames, you should gradually step down the quality ladder, by choosing a lower quality setting in from the drop down menu.
Pic Video MJPEG:
Set the quality to 18 or 19 and in advanced Luminance Quality to 2 and Chrominance Quality to 3.
FFVFW MPEG4 compression:
(This applies only to VirtualDub
horizontal+vertical reduction, or 400 (or such) x 576/2 virtualdub capping, ie for
good quality low-size capping.)
If you're not satisfied with the performance of huffyuv (too
pixelated images on sharp sources) or mjpeg (mosquito noise
aka ringing) compression schemes on lores capping, and you're
lacking the space those codecs require, you may wanna try a fast mpeg4
compression on 'quantizer 2' and somehwat narrowed KF (KeyFrame) span. This will result in greatly reduced bitrate and better
quality images than huffyuv or mjpeg can provide on low size video.
You can grab ffvfw here, install it, and after that you have 'ffvfw MPEG-4 Codec"' in VirtualDub codecs choice. Select it, click "Configure" and ensure you use the following settings:
If you have problems opening such MPEG4 clips in VirtualDub via AviSynth or in VirtualDub itself, you need to add the following to your registry file (1):
REGEDIT4
[HKEY_LOCAL_MACHINE\SOFTWARE\Microsoft\Windows NT\CurrentVersion\Drivers32]
"VIDC.YV12"="ffvfw.dll"
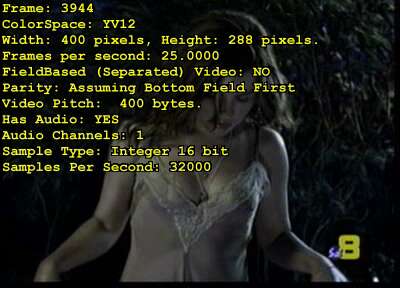
When using AviSynth for post processing, it will output the color format of the used MPEG4 codec itself: YV12. As seen in this image made with AviSynth's 'Info()'.
We picked FFVFW MPEG4 because it is the fastest MPEG-4 codec and it's the best suited for analogue capping purposes (as it handles noisy
images without annoying artefacts some other MPEG4 codecs produce). (This is the
case at the moment of
writing this page).
This way of capping has been tested on Celeron600+VirtualDub+Win2K+Btwincap, and
worked very satisfactory.
If you are done with your settings, it is time to save
them to avoid having to go through the whole process every time: Capture
-> Preferences
Save the "Default Capture file" in the same directory
as you have saved your spill drives (here D:\capture\), and check
all boxes next to 'save'. Set up "Initial display mode"
the way you need it (WDM drivers Overlay, otherwise No Preview).
The options to enable channel switch depend on your hardware. If
your card is one of the mentioned below, you can check it,
otherwise you should leave channel switch disabled.
Now you are finally done with the important settings and can proceed to the actual capture process. If you want to use the bt8x8 Tweaker (for cards with the bt8x8 chip) to tweak your settings, have a look at bt8x8 Tweaker.
Have a look at the VideoWDMControl utility (mainly ATI users) if you need a quick shortcut to driver settings they cannot reach from within VirtualDub (like PAL/NTSC/PAL60 switching etc). It allows you access to the cap driver tabs without having to start up a second directshow capping app.
References:
VideoWDMControl:
freeware utility for control WDM driver.
You now have two possibilities to start the capture, either manual or using the timer:
Manual:
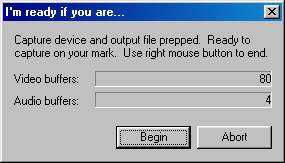
Capture -> Capture Video
One click on 'Begin' is enough to start the capture.
Using the timer:
Since we have this function anyway, why not just set it up and go to the local pub and have a few beers? It would to be stupid if we didn't:
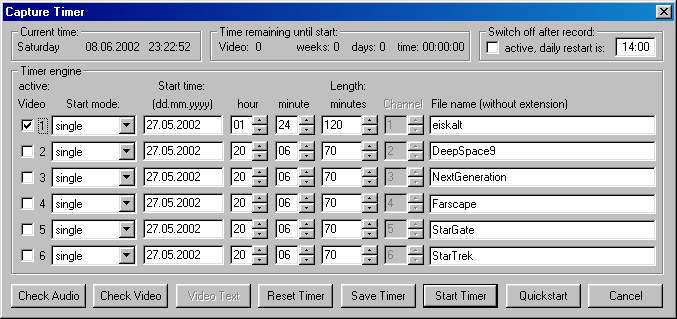
Capture -> Capture Timer
In the window that appears now, just set start time, length and
file name, check the box below video and hit 'save timer'. Then
you'll just have to hit 'start timer' and off you go! VirtualDub
will start the work at the appropriate time.
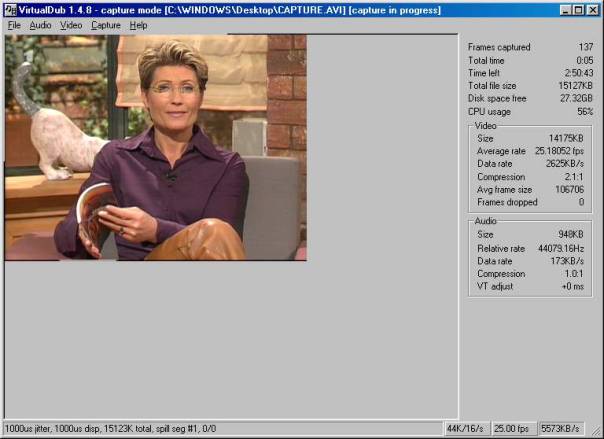
During the capture process you'll see the following window
You should probably have a look at the CPU usage and the dropped
frames. If the CPU usage is constantly above 90% and there is a
large number of dropped frames, you might want to check back to
the FAQ once more or otherwise switch to a lower resolution.
Ideally you'll have of course 0 dropped frames. If you have a
decent configured system running under WinXP this shouldn't be
too much of a problem anyway. Furthermore, you should not touch
the computer during the capture process!!!
After the movie/clip has ended, hit the escape key (not
necessary when using the timer, of course) so the capture is
stopped.
Then you should exit the capture mode File -> Exit Capture
Mode.
Downloads:
VirtualDub:
homepage of VirtualDub
VirtualDub-MPEG2:
MPEG-2 Upgrade for VirtualDub 1.5.10 by fccHandler, it allows for
horizontal reduction during capturing.
VirtualDub VCR + SYNC:
Sometimes VirtualDub will drop frames from the video to re-synchronize the video
and audio streams again. VirtualDub VCR+Sync resamples the audio stream during
the capture to compensate for any irregularities to reduce the amount of dropped
frames. If VirtualDub gives you dropped frames, you can try this variant.
VirtualDub filters:
from Donald Graft
VirtualDub filters:
hosted by Donald Graft
VirtualDub filters:
from others
Footnote:
(1) Just put the italic text in a text-file, and save it as ffvfw_yv12.reg.
Right-click on the reg file and select Merge (to add it to your registry file).
Next: Postprocessing using VirtualDub or using AviSynth
Back to the Index: HOME
Last edited on: 06/13/2004 | First release: n/a | Authors: Version4Team & BaronVlad & Translator: SteVe (killingspree) | Content by Doom9.org